Knowledge Base
How to Replace the Battery in Your CyberMed/Cybernet T10 Tablet
Published: July 8, 2013
Updated: October 3, 2017
If you have followed the appropriate troubleshooting steps and it is determined that the battery in your T10 Tablet is dead and needs to be replaced, the fastest way to get your tablet back up and running is to change the battery yourself. Since the tablet uses much smaller parts and screws than a standard PC, this would be considered an intermediate task. You will need a small Phillips head screwdriver to accomplish this task.Updated: October 3, 2017
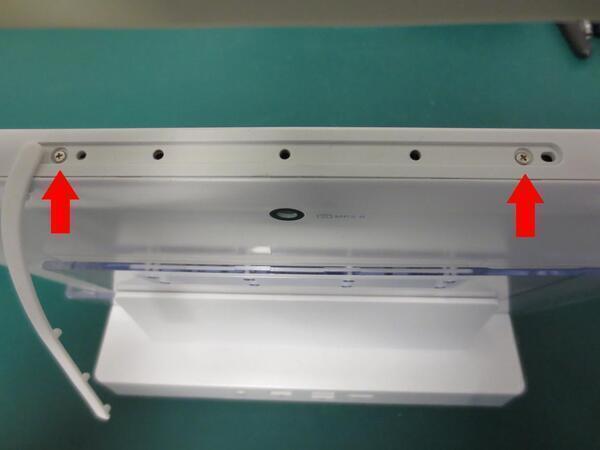
The first thing we need to do is move the screw cover out of the way, so that we can get to the screws that hold the back cover in place. The screw cover can either be a rubber type (white or black depending on the T10 you have) or a clear plastic piece that is made for holding a stylus.

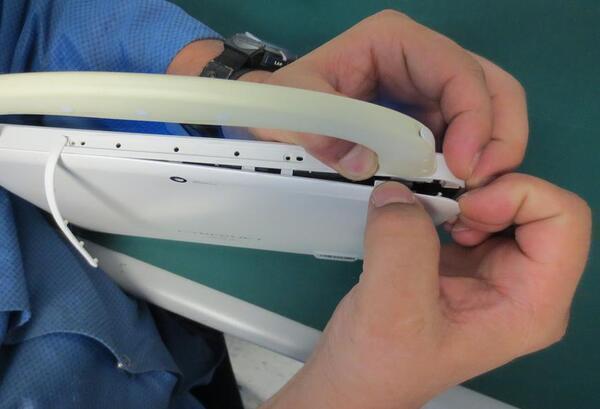
The clear plastic stylus clip can be removed by pulling straight up on one side of the clip. Much like the rubber type, one side will come off easier than the other side. Once all but the one side are popped out of place, swing the rest out of the way.
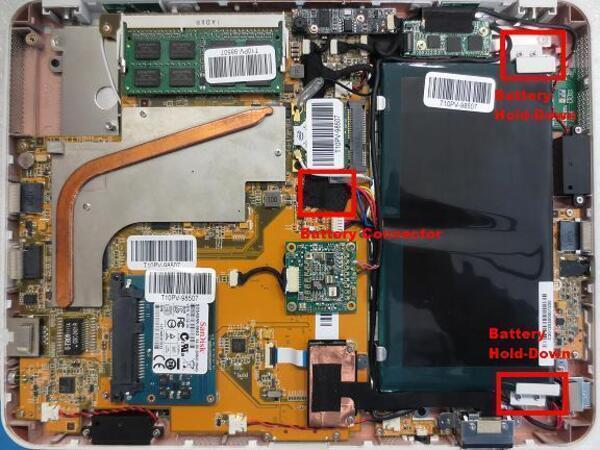
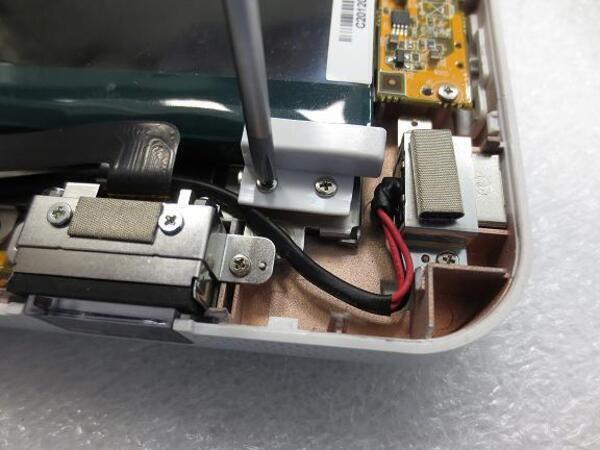
Caution: When removing the battery, carefully pull it off of the double sided tape, so as to not damage the display panel.
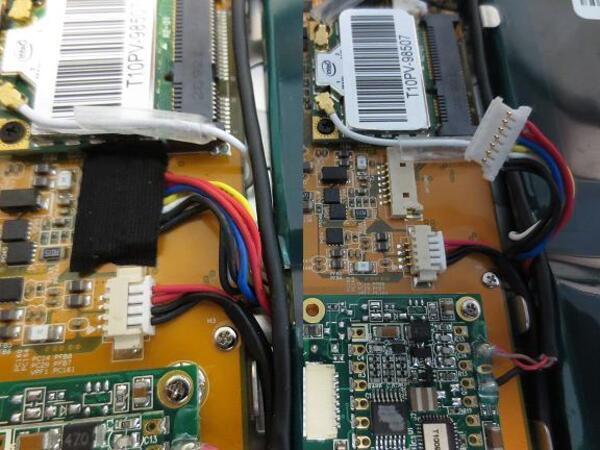
Once you have the old battery out, it is just a matter of reversing the process to install the new battery. Put the new battery in place, screw the battery hold-downs in place, connect the battery to the mothreboard, replace the electric tape on the connector, replace the back cover and install the two screws that go in the top of the unit.
Related Articles
How to Check the Battery Wear Level on a Unit Configured with an Internal Battery
Over the course of using an internal battery equipped unit day in and day ...
View Article
How to Check if Your CyberMed/Cybernet T10 Tablet Battery is Dead or Dying
Due to current rechargeable battery technology, after normal usage, the ...
View Article
How to Check the Battery of Your CyberMed/Cybernet T10 Tablet Battery to see if it has been disconnected internally
If your tablet will not take a charge at all, this can either be due to the ...
View Article