Knowledge Base
How to Reseat the CyberMed H22/N22 Touch Controller
Published: October 8, 2013
Updated: October 3, 2017
In this article we will be explaining the proper procedure for opening, reseating the touch controller, and closing of a CyberMed H22 or N22. This should be performed if the calibration for the unit won't save properly. You should try and calibrate using the touch software provided with the unit before attempting this procedure. If the cable has become loose then the touch will not calibrate properly. Please follow these directions precisely as not following these steps can cause damage to the touch glass.Updated: October 3, 2017
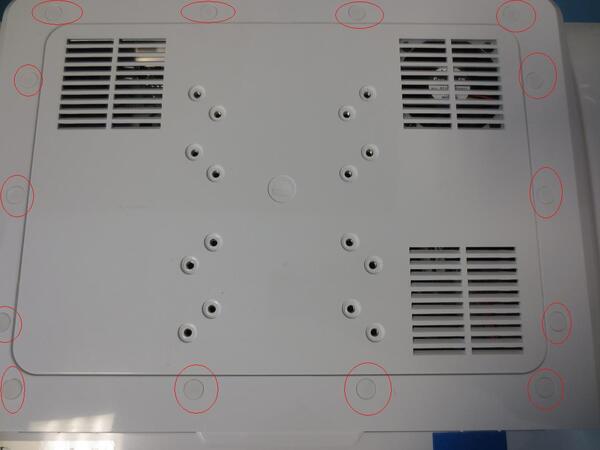
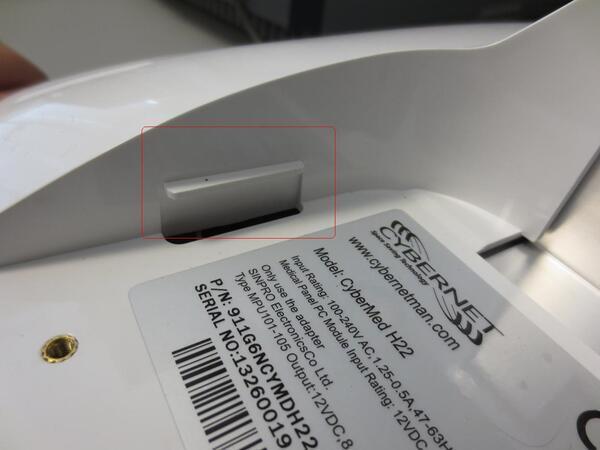
First take the unit off any base or wall mount and set it on a protective flat surface such as bubble wrap.Now remove the rubber screws covers circled below.
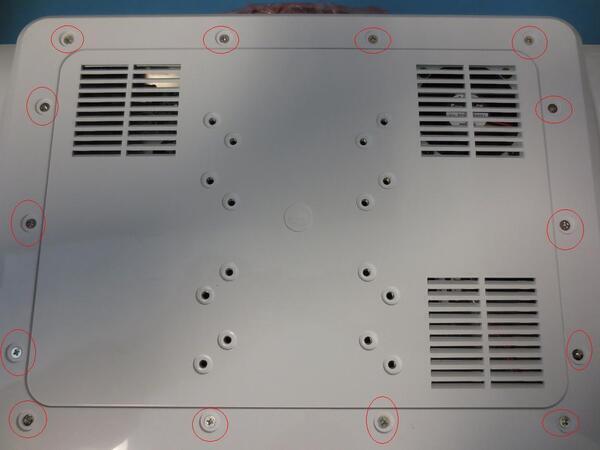
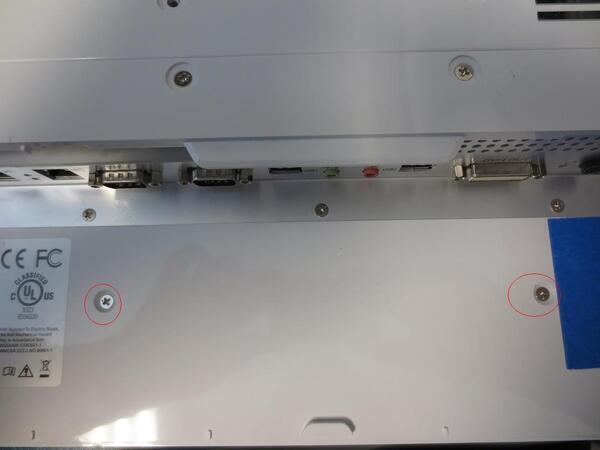
Now remove the screws underneath the rubber covers. Also remove the two screws at the bottom of the unit.
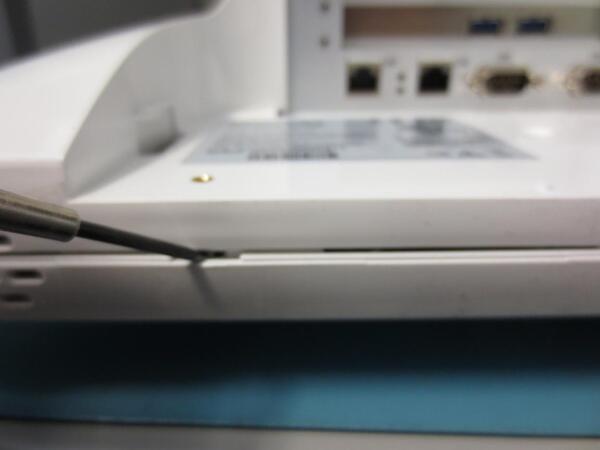
With all the screws removed we now need to remove the back cover. First loosen the cover by using a small flathead screwdriver. Insert it between the front and back cover and pop the clips along the bottom of the unit.
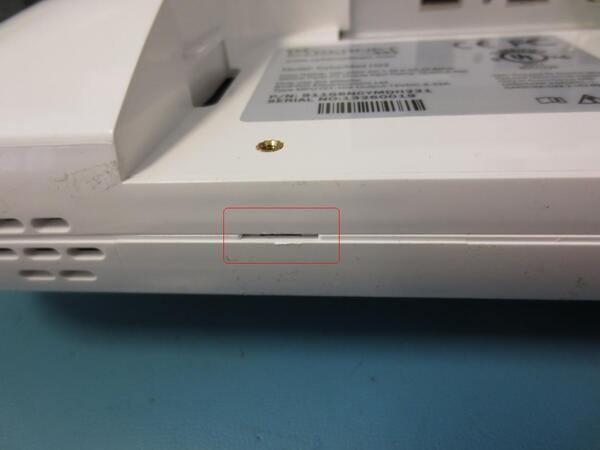
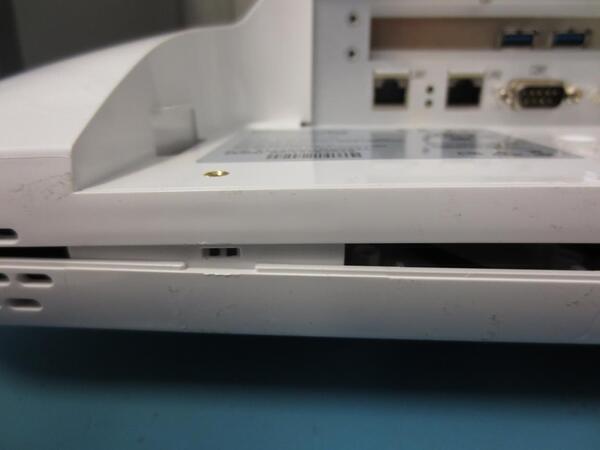
Now with the bottom portion of the unit loose you will grab the location shown below and pull up. You may have to give it a little extra effort to get the back cover off.

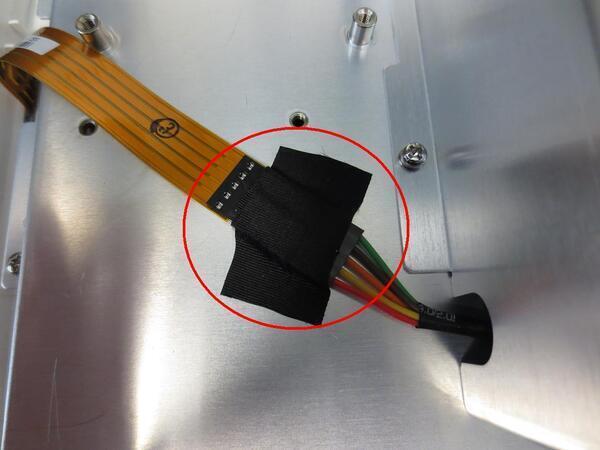
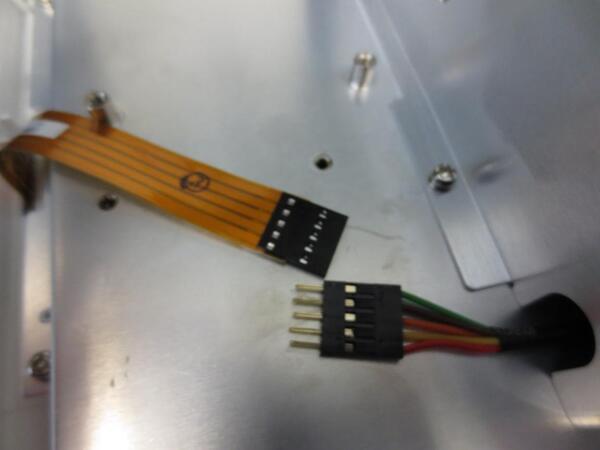
Now with the back cover off you will see the touch controller ribbon. Remove the tape that wraps around the controller and re-seat the touch controller cable. Wrap the controller back up with tape and secure it to the unit with another piece of tape.
With the controller plugged back together and secured we now need to put the back cover back on.
Important: The back cover needs to be re-installed in the order described below. going out of order can cause damage to the touch glass.
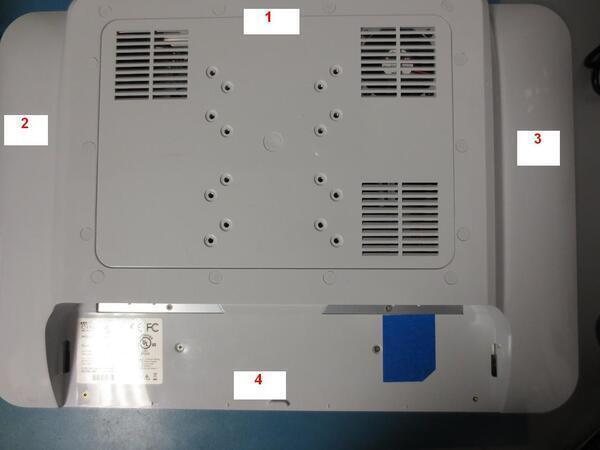
1. You will want to start by reseating the top portion of the back cover. (Labeled 1)
2. Once the entire top portion of the back cover is reseated you will want to reseat one of the sides (Labeled 2 or 3)
3. Now reseat the other side. At this point you should have the top and both sides closed.
4. Lastly, reseat the bottom portion of the back cover (Labeled 4).
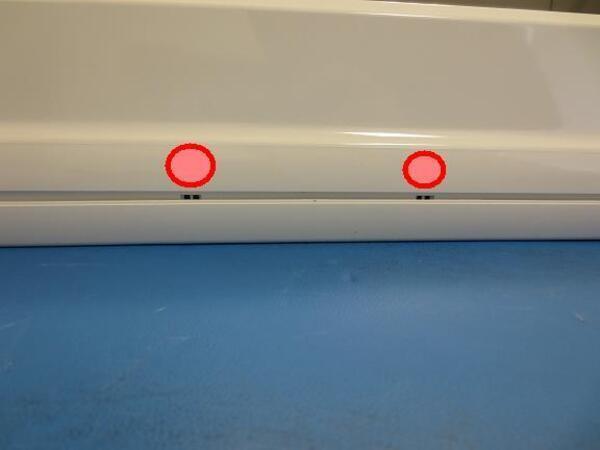
When you are reseating the rear cover, you will come across spots that seem as if they are stuck. Do not force the rear cover. If you look between where the front and back pieces come together, you will see rectangular holes. This is where the two pieces clip together. If you press inward just above the rectangular holes (Marked with red circle below), it will clip into the front cover. Just work your way around the top, then both sides and lastly the bottom.
The cover should now be closed. Just put the screws and screw covers back in.When you boot into Windows you should only need to calibrate the touch again. It should be in working order after the touch calibration. If you have any questions on this process please contact Tech Support.