Knowledge Base
How to install a TPM module into your Cybernet unit.
Published: November 15, 2013
Updated: October 3, 2017
This knowledge base article applies to the following Cybernet units:Updated: October 3, 2017
iOne-H5
iOne-H5G
iOne-H19
iOne-H6
iOne-H6G
CyberMed-H19
CyberMed-H6
CyberMed-H24
This article does not cover opening any specific models, but all of the models covered by this knowledge base are opened in a very similar fashion. Remove base/mount screws, remove rear housing screws, remove I/O plate screws and remove metal cage screws.
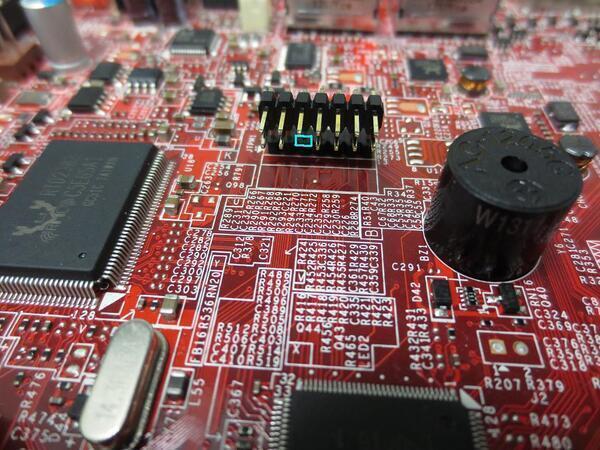
Other Cybernet units will accept a TPM module, but the header location is different depending on the model of the unit. In the image below, you will see the TPM module for the above listed units. What we want to take note of on the module itself is the keyed pin hole location, shown below. This blocked pin hole is important to make sure the module is installed in the correct orientation.


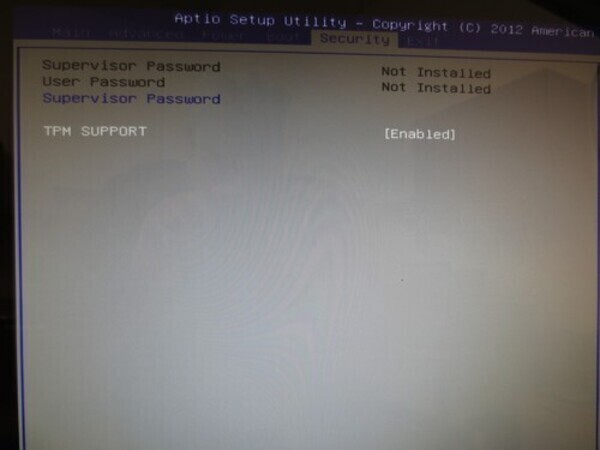
Once in the BIOS, press the right arrow four times, to get to the Security tab. You will see an entry at the bottom for "TPM SUPPORT." This entry should be set to Disabled by default. Press Enter to change the entry to Enabled. Once the TPM SUPPORT entry is set to Enabled, you will want to press the right arrow to move one tab over to Exit. Select "Save & Exit Setup."