Knowledge Base
Troubleshoot Basic Network Connectivity Issues
Published: November 19, 2013
Updated: October 3, 2017
Updated: October 3, 2017
Tags:
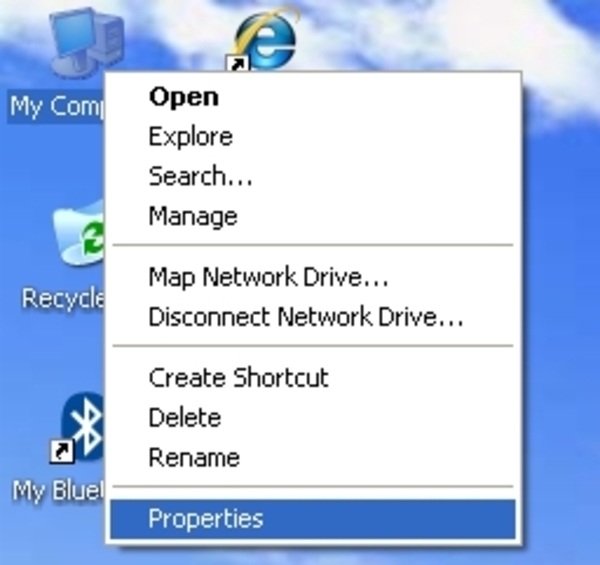
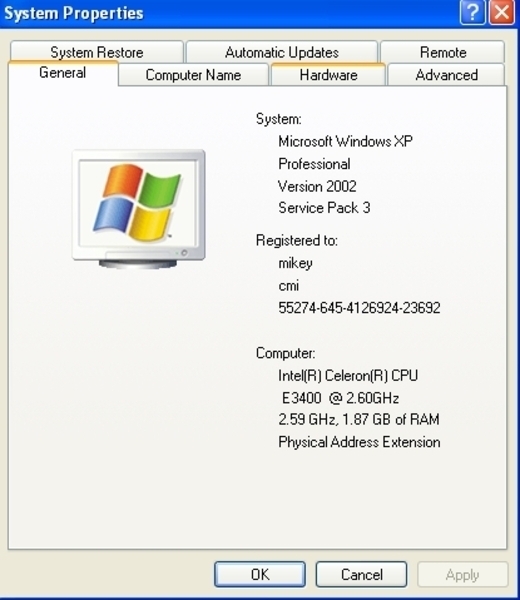
In this article we will be giving some troubleshooting steps on network connectivity. There are many hardware or software issues that may cause network connectivity issues. We recommend that you verify your network cables and switch or router ports are tested working. Any kind of switch or router security such as MAC address filtering should be disabled during testing, if you are having issues. If none of these steps help you then you may want to reimage the unit to make sure it isn't a corrupted operating system issue. There is no one spot to start with and this article is just a guide of some steps to try and isolate where the issue is. While Windows XP was used for this guide most of the same steps can be used for Windows 7 or Windows 8.First we would recommend checking device manager to see if there is any kind of driver issues. To navigate to device manager right click on the My Computer icon and choose properties.
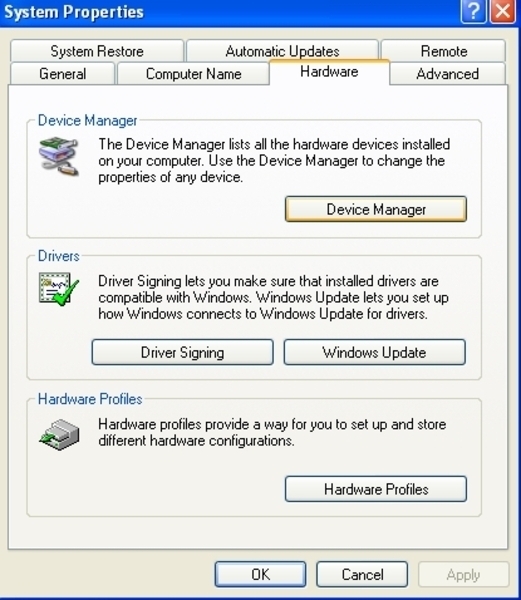
Now click the Hardware tab at the top.
Finally choose Device Manager.
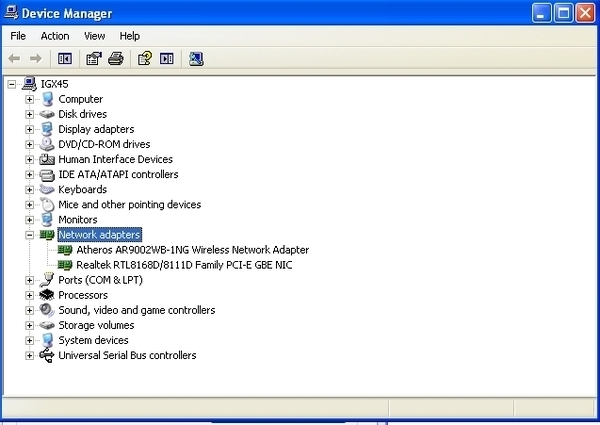
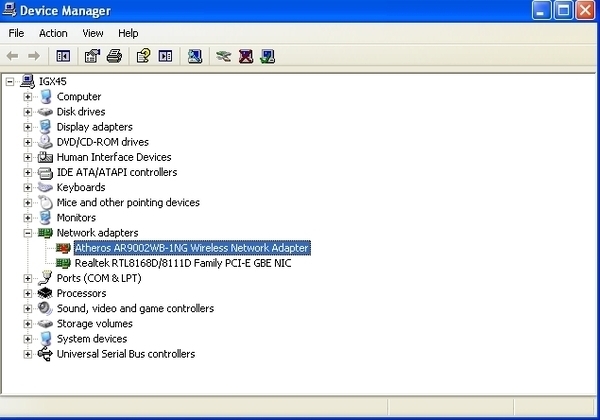
Here is how Device Manager should look. Notice there are no errors on either of the Network adapters.
Here is a picture of Device Manager with a disabled network adapter. When you see a red X simply right click the device and choose enable.
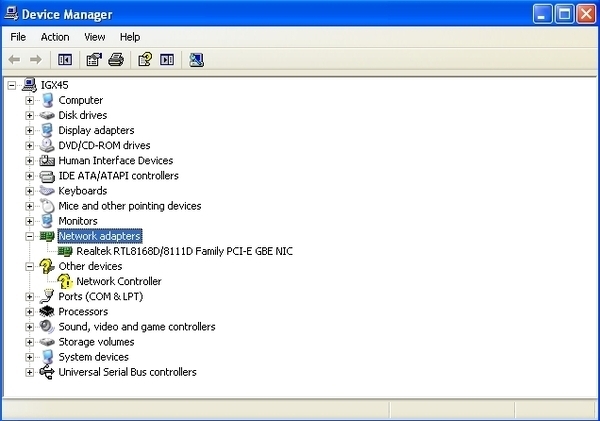
Here is a picture of Device Manager with a network adapter that needs a driver installed. If you have this you will need to install the driver either from the supplied driver disc or from our FTP.
If there are no errors in Device Manager then we recommend you verify that Windows sees a network cable plugged in or a wireless network to connect to. The picture below shows the wired network adapter in the system tray with no cable connected. Notice it has a red X over it.

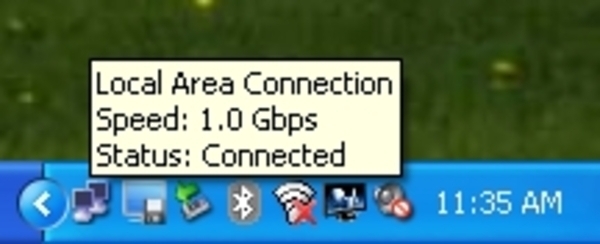
Here is a picture of what the wired network adapter looks like when a cable is connected.
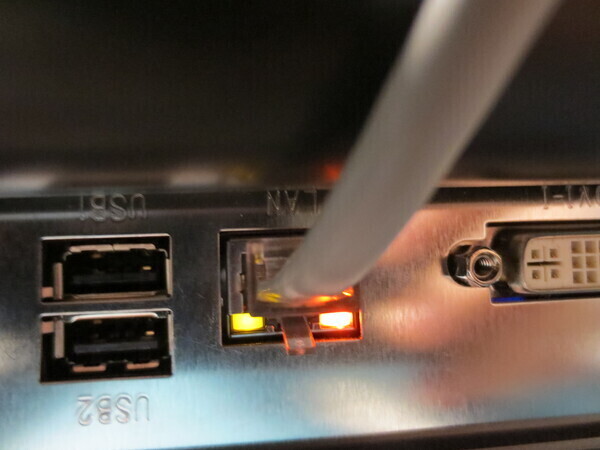
You can verify that the network port on the unit is showing activity as well. You should see lights on the physical wired network port.
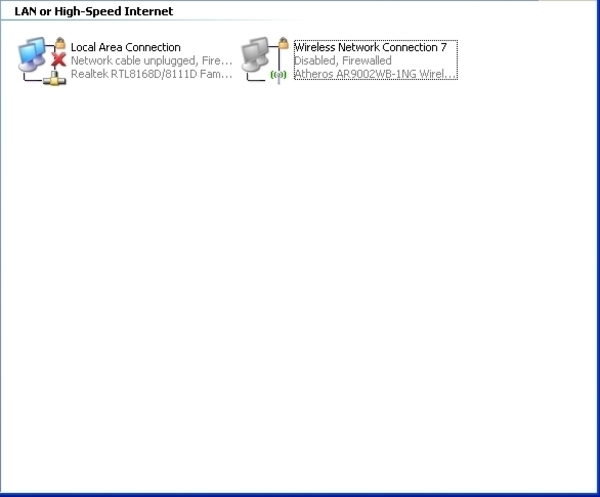
Here is a picture of what the wireless network adapter looks like when it is disconnected.
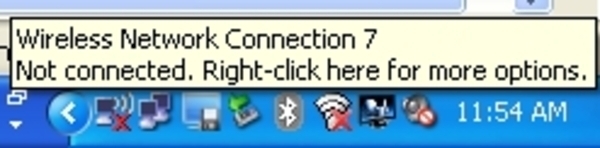
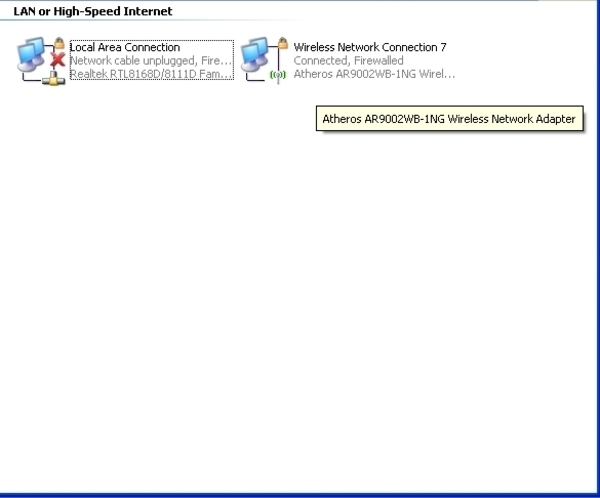
Lastly, here is a picture of what the wireless network adapter looks like when it is connected.

To connect to a wireless network all that is needed is to right click the wireless adpater icon in the system tray and choose View Available Wireless Networks.
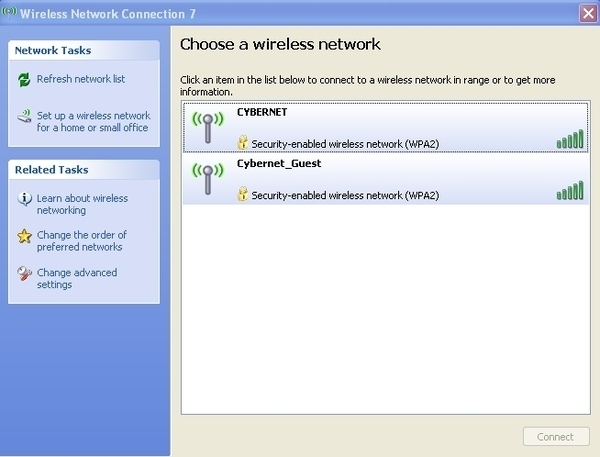
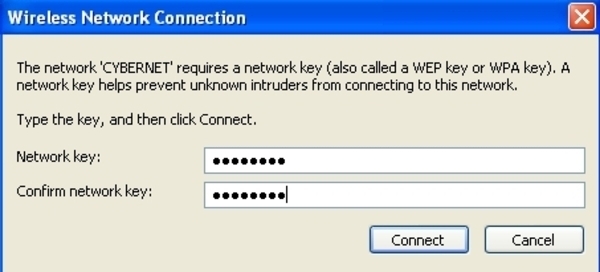
Now highlight your wireless network and choose Connect. At this point you will be prompted for any kind of security password. If you have WEP/WPA enabled you will need the passkey in order to connect.
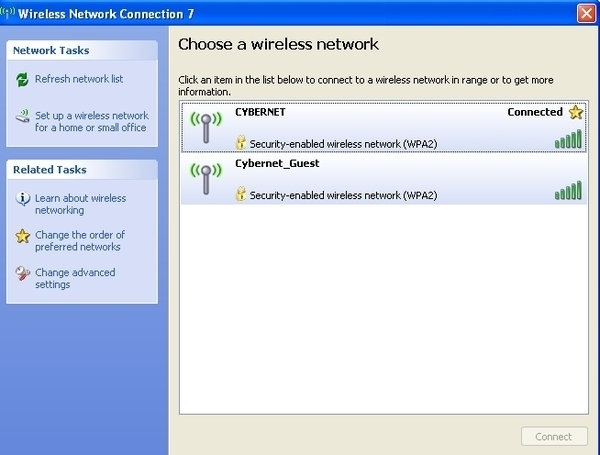
After entering in the key you will see it say Connected next to the wireless network.
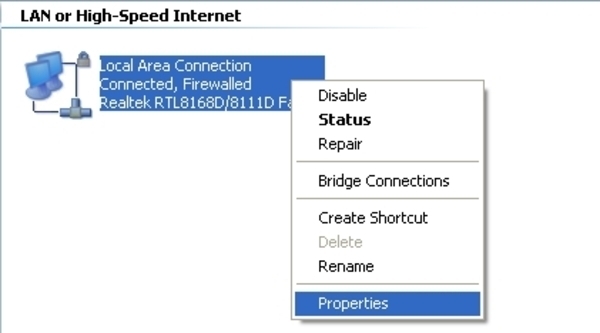
Even though Windows says you are connected to the network it is possible that you aren't receiving an IP address. An IP address is what allows the computer to communicate with other computers on the network. To verify IP settings right click the adapter icon in the system try and choose Open Network Connections. You will see a screen like the picture below.
In the picture below you will notice that the wireless adapter is disabled. You would need to right click the network adapter and choose enable to get it working again.
Now we will see if you are on a DHCP, automatically assigned, IP address or Static IP address. Static IP addresses are assigned by you while DHCP is assigned by your DHCP server. Right click the network adapter in question and choose properties.
Now you will get the following window. Locate the Internet Protocol (TCP/IP) and choose properties.
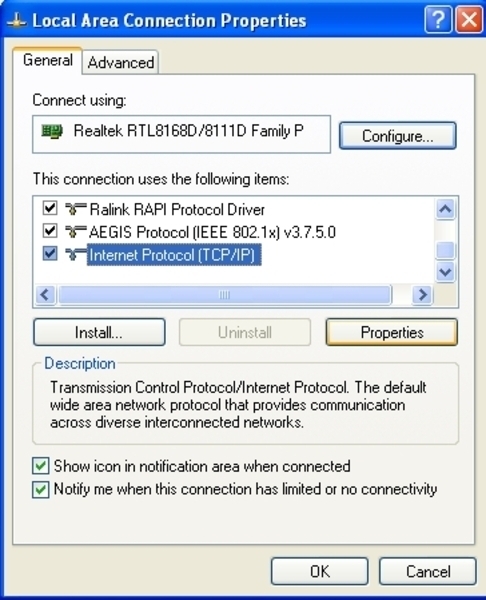
Here you will see two options. The first is "Obtain an IP address automatically", if this is set then you are using DHCP. If the "Use the following IP address" is selected then you are using a static IP address.
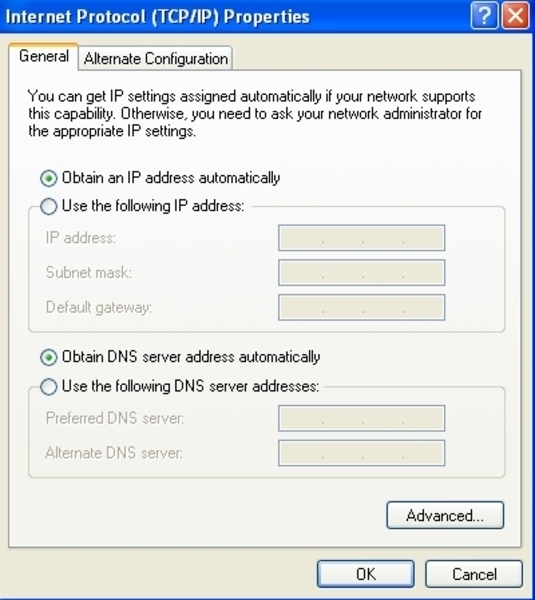
Possible issues that may be happening here is the static IP isn't on the same subnet as the gateway so the two can't communicate. As for DHCP it is possible that the DHCP server isn't giving an address lease to the computer. The next part of this guide we will be going through the process to check the actual IP address assigned.
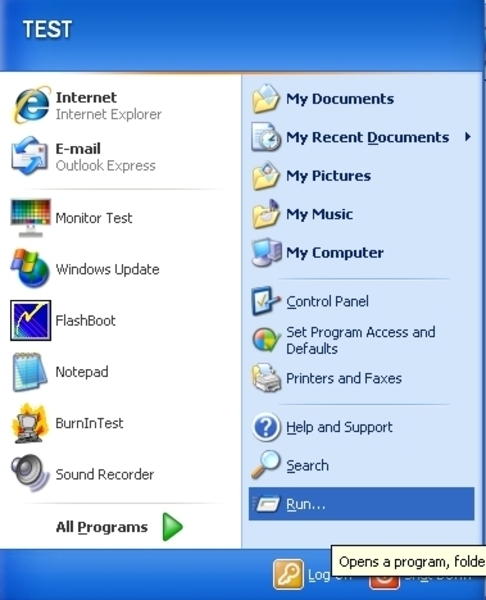
First click the Start Button and choose Run.
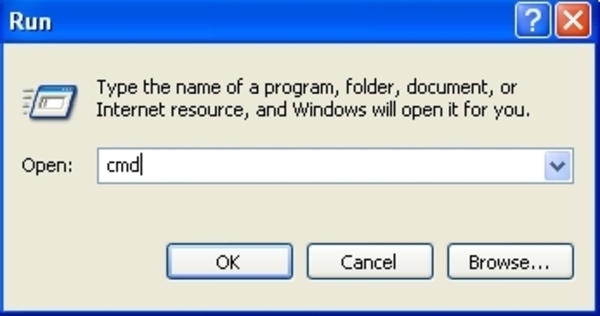
In the Run prompt type CMD and hit enter.
You should now have a command prompt opened.
Now type the command ipconfig /all and hit enter. You will see output like the picture below. In this example you will see the wired connection is disconnected and the wireless adapter has a DHCP IP address of 10.0.0.6 and has a gateway of 10.0.0.1. If you see a 169.254.x.x IP address this means that no DHCP server could be found and this is most likely your issue.
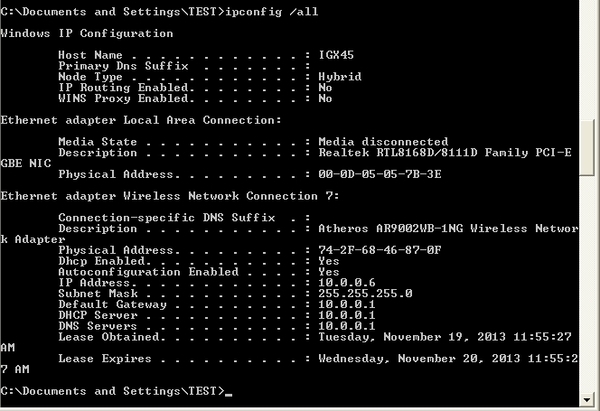
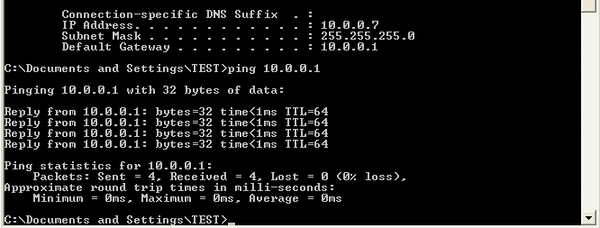
Now you can verify you can communicate with your gateway by typing ping 10.0.0.1 where 10.0.0.1 is the IP address listed as your Default Gateway. If you see 4 entries that say reply from the Default Gateway IP then you are able to communicate and the issues you are having aren't hardware related on the computer. We would recommend checking the router or switch for configuration settings.
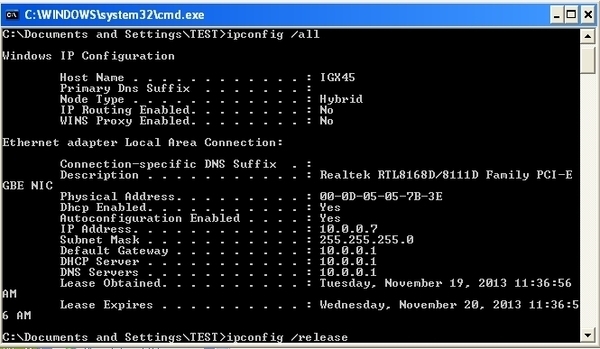
You can refresh the IP address given to you by the DHCP server with the following two commands. First type ipconfig /release and then type ipconfig /renew. You will be letting go of your current IP with the release command and asking the DHCP server for a new IP with the renew command.

If you are still having issues with connectivity then we would recommend the following DOS based troubleshooting steps. Please note that you may have a corrupt operating system as well and the unit needs to have a system restore or a reimage of the computer.
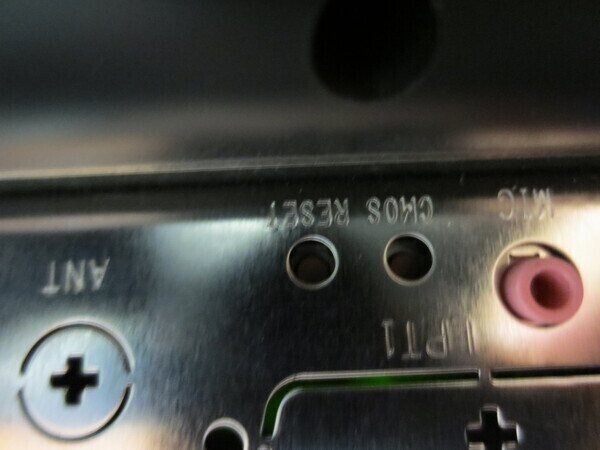
The first step would be to clear the CMOS. You will want to power down the computer, unplug the power adapter from the wall and then unplug the power adapter from the computer once the LED on the power supply goes off. With the power supply unplugged locate the CMOS micro switch. On most of the iOne model units you will find it at the input/output ports on the bottom. With a ZPC model you will find it on the side on most cases. Here is a picture of the CMOS micro switch on a iOne-GX45. With a paper clip click the micro switch several times, you should feel it click.
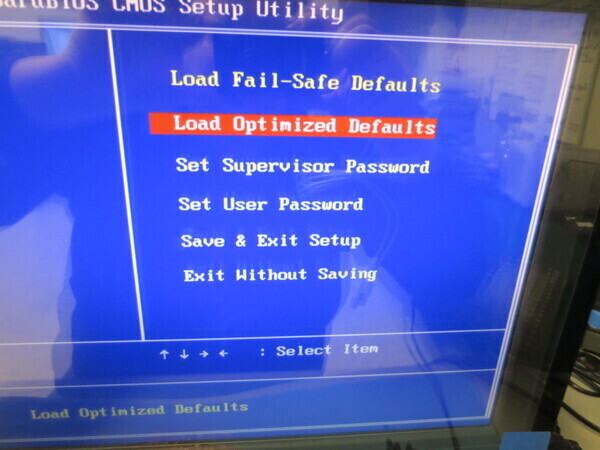
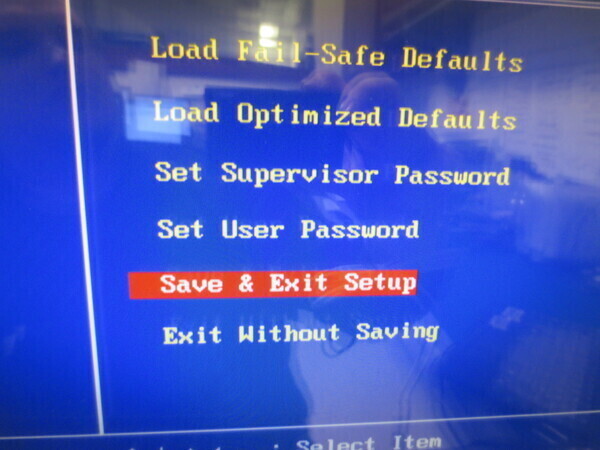
Now plug the power supply into the computer and then back into the wall. Power on the unit and tap the delete key or wait for the prompt saying the CMOS settings have been reset. Depending on the unit the BIOS will look different but the settings are the same on all units. What you want to do is Load Optimized Defaults and then Save and Exit.
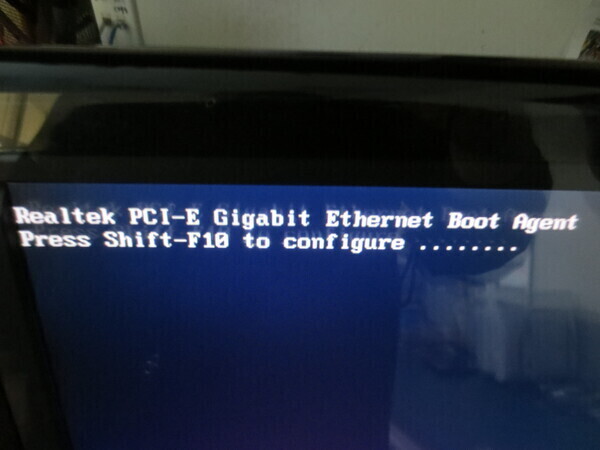
Now while it is rebooting you can check the Realtek boot manager. You enter the boot manager by tapping the Shift + F10 key during initial startup.
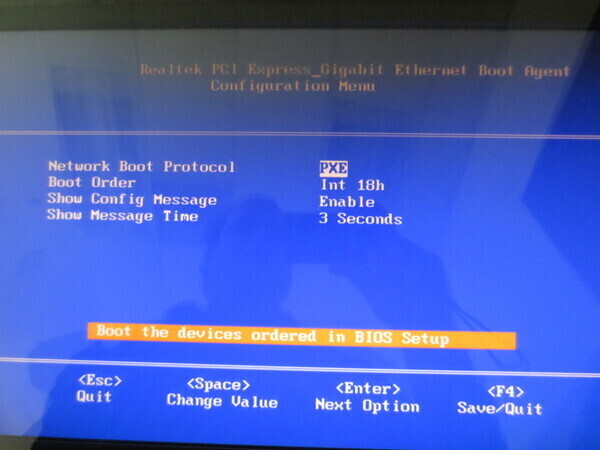
When you enter the manager make sure that the port is Enabled and set to Int 18h. If you have two network ports on the unit you will have to hit F4 to save and quit but hit Shift + F10 immediately after exiting to bring up the boot manager for the other network port. Each wired network port has its own Realtek boot manager.
If you are still having network issues then you should contact Tech Support for further help.