How to Install an RFID Reader into the CyberMed/Cybernet-T10 Tablet
Published: June 5, 2013
Updated: October 4, 2017
Adding RFID to the T10 Tablet is fairly straight forward, but would be considered an advanced task, since the tablet uses much smaller components than a standard PC. It is recommended that you proceed with caution.
What you will need to perform this task:
Small Phillips Head Screwdriver
Double Sided Tape
Scissors or Razor Blade
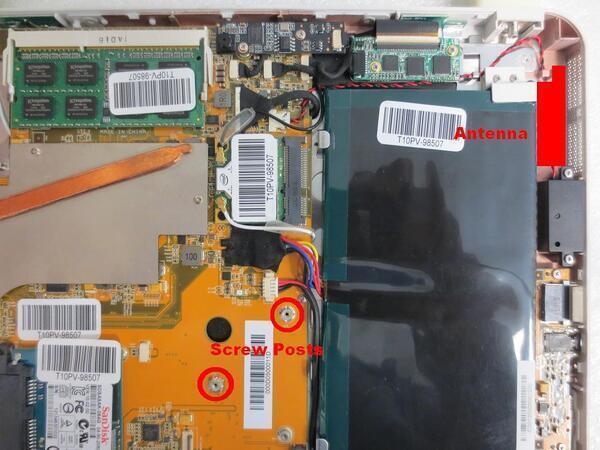
In the image below you will see the inside of the T10 before the RFID reader is installed. In the upper right corner you can identify where the antenna will be installed. In the bottom middle of the image you will see the two screw posts where the RFID module will be screwed down.
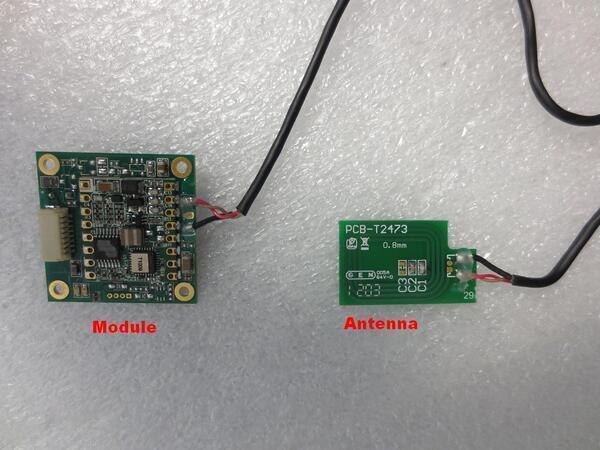
Now that we know where the RFID parts will go, let's take a look at the parts themselves. In the image below, the RFID module is on the left and the antenna is on the right. The module is what does the work and interfaces with the unit. The antenna is the location you want to swipe your RFID tag, once we are done. This means you will be swiping in the upper left corner of the tablet.
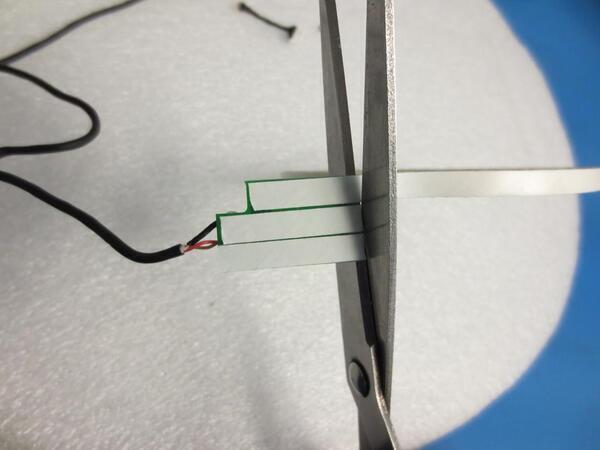
The first thing we want to do is prepare the antenna. This is where you will want the double sided tape. here at Cybernet we have double sided tape that is skinny and thin, so we put a few rows of tape on to cover the entire back side of the antenna. If you can only get the double sided tape that has the foam in the middle, that will work fine also. The key is to trim your double sided tape so that it is no bigger than the antenna itself.
Note: The back side of the antenna has no electronics or circuits on it.
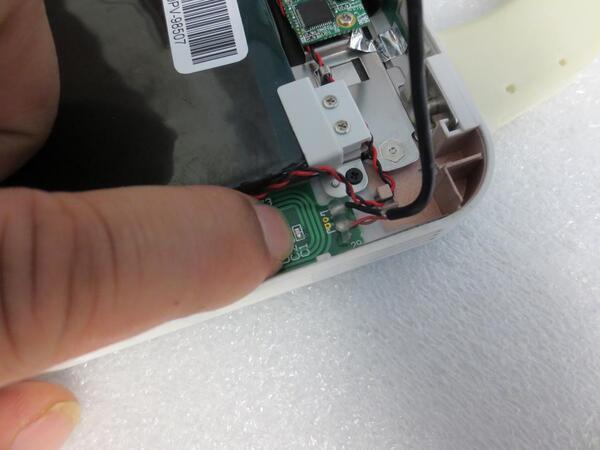
Next we just need to carefully place the antenna in the correct spot. The antenna should fit nice and neat in the spot located in the top image. You will find that there is a little flat area in the same shape located in the housing. Be sure to move the small red and black speaker cable out of the way when you place the antenna down. Then just press it firmly in place, applying pressure for a few seconds, to make sure the antenna will stay in place.
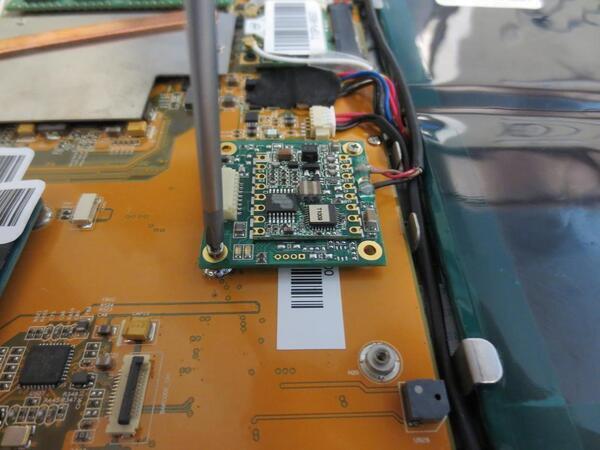
Now that the antenna is in the proper place, we need to screw down the RFID module. The module has four screw holes in it, but we only need to use two of the holes. With this in mind, it is important to align the module correctly, so that we can connect it to the motherboard. On the opposite side that the antenna cable is connected to, you will find a small white port. This port needs to face to the left and the antenna cable goes out to the right.
With the antenna and module in place, we only need to connect the module to the motherboard using the small black and white cable. The connectors on the cable are keyed, so that they will only go in one direction. The cable takes very little pressure to insert. If you are pressing and the cable won't go in, flip it over and it should slide in easily.
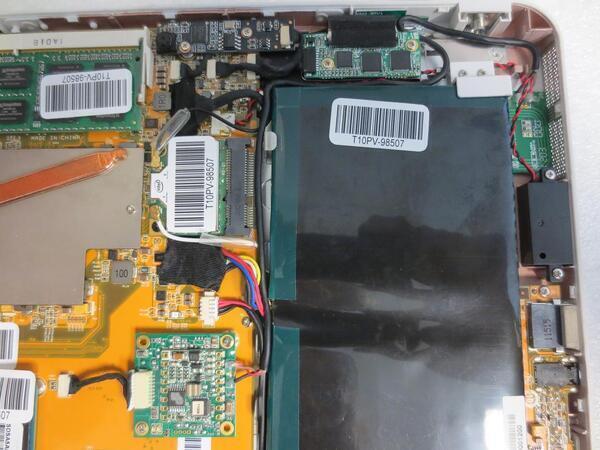
You have now successfully installed RFID into your T10 tablet. The only thing left to do is run the antenna cable neatly around the top of the battery. You want to run it up the left side of the battery, to the top, then along the top to the right. any slack in the cable can be bunched into the the area to the right of the touch controller. Make sure nothing is sticking up in the way of the back cover being replaced.
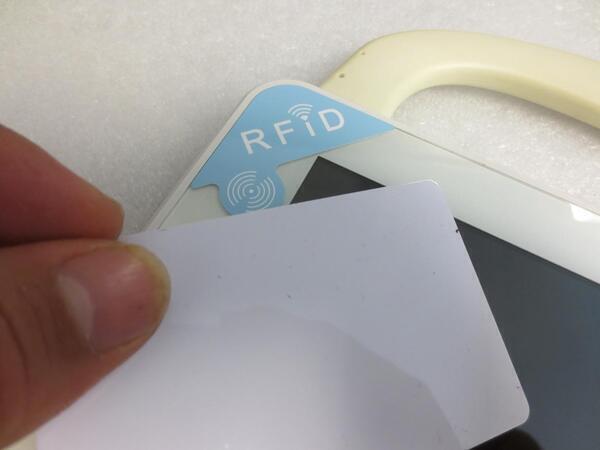
The final step in the installation process is to test the RFID reader to make sure it is functioning properly. The simplest way to test the RFID reader is to wave a compatible RFID tag near the front upper left corner of the tablet. You should hear an audible beep when you wave the RFID tag near the antenna location.