Knowledge Base
How to Recover a Windows 7 System Using a Windows 7 Repair/Recovery Disc and Factory System Image DVD
Published: June 7, 2010
Updated: December 22, 2015
Updated: December 22, 2015
Tags:
WARNING - The following steps, once completed, will return the Cybernet system to its factory fresh state. As such, any applications, data, etc. that have been added to the machine since its purchase will be LOST. Please be sure to make a proper backup of all important data prior to beginning this process (See related articles for more information).1. Power on the computer and immediately begin repeatedly pressing the F11 key until the system Boot Menu screen appears. Insert the Windows 7 Repair disc in the drive, highlight the CD/DVD Optical drive as the boot device, and Press enter. When prompted, press any key to boot from CD/DVD.
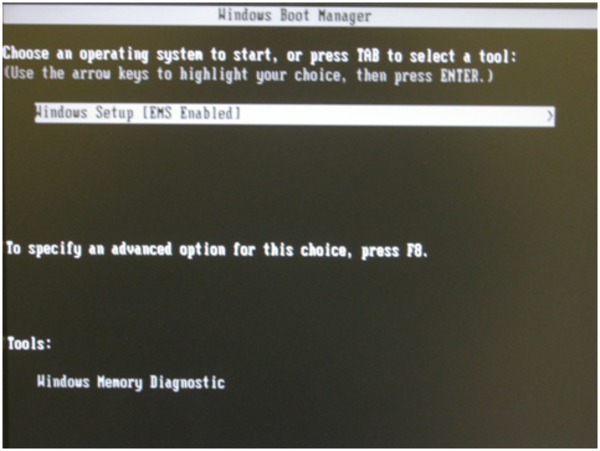
2. At the Windows Boot Manager screen, ensure Windows Setup [EMS Enabled] is highlighted and press enter.
3. Please allow a few moments for the disc to load the Windows repair boot. When loading has completed,
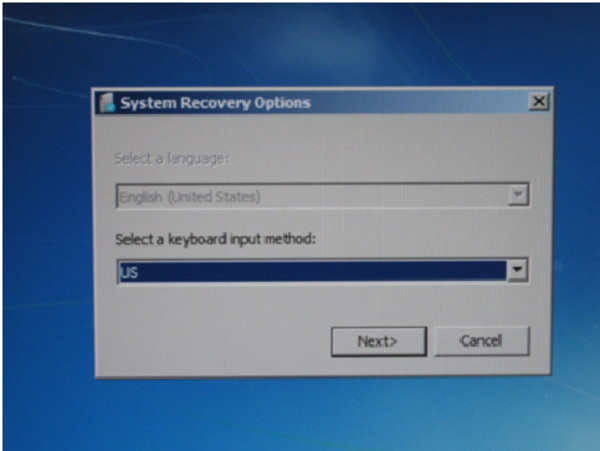
click the Next button for the next two System Recovery Options screens.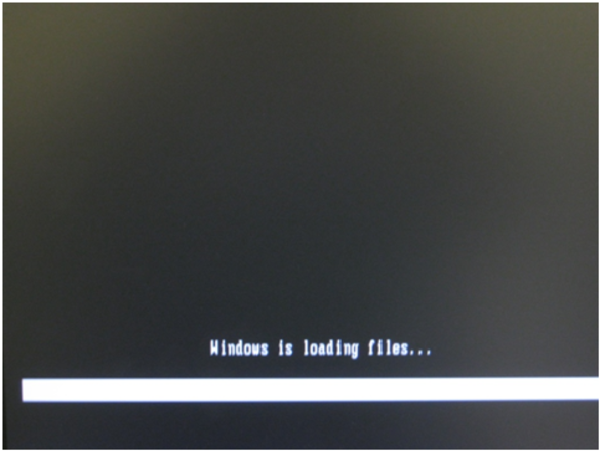
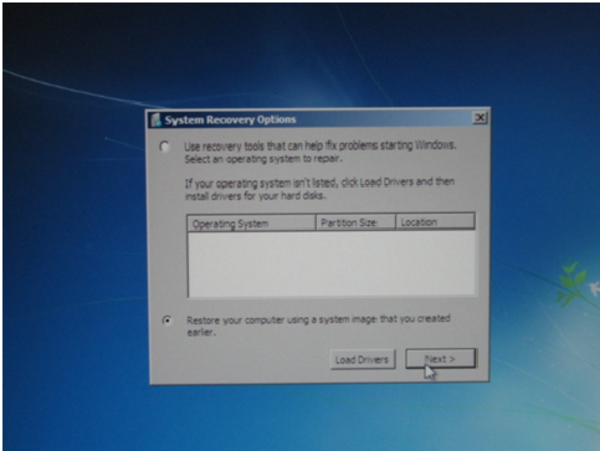
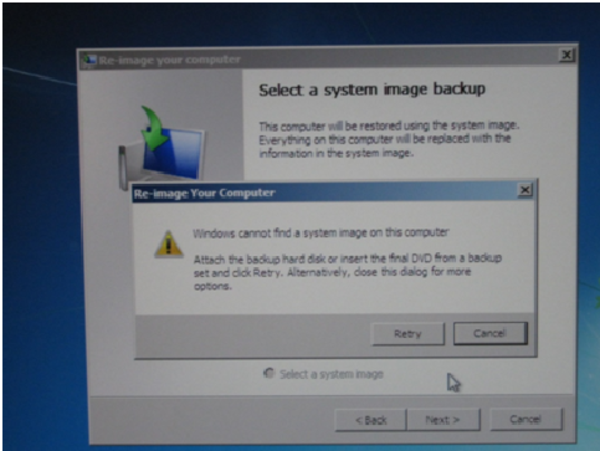
5. When the system image to restore from has been selected, two different options will appear. The option for Latest available system image is best, however if this option is unavailable then choose Select a system image and click Next.
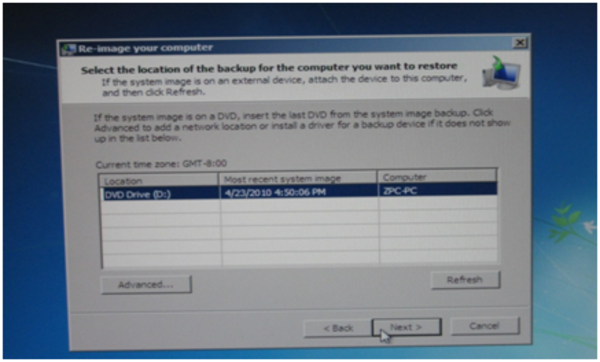
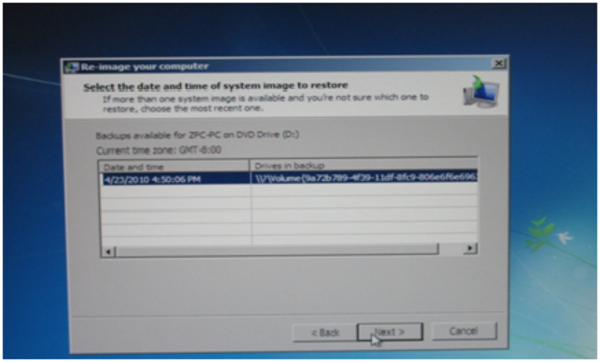
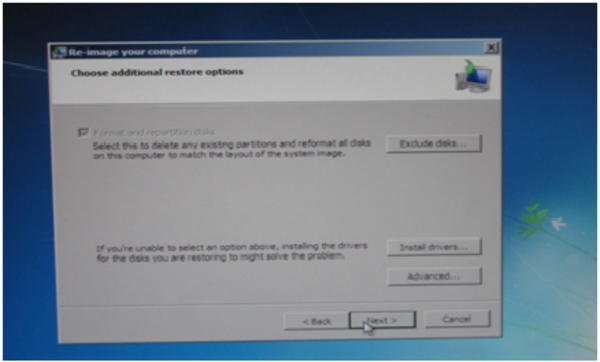
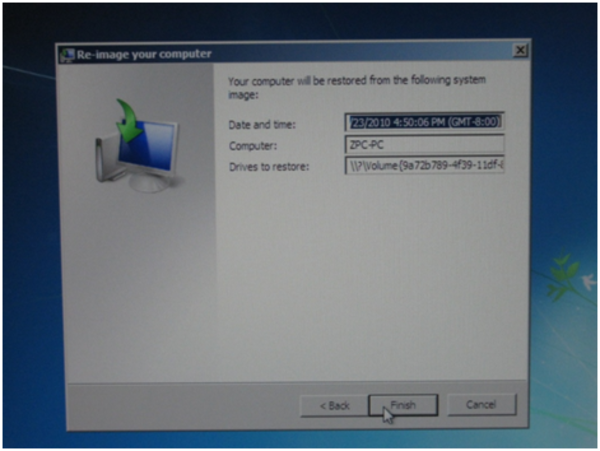
6. Click Next for the next three prompts (Re-image your computer).
7. Now the confirmation screen should appear; confirm the correct image is being restored, then Click Finish.
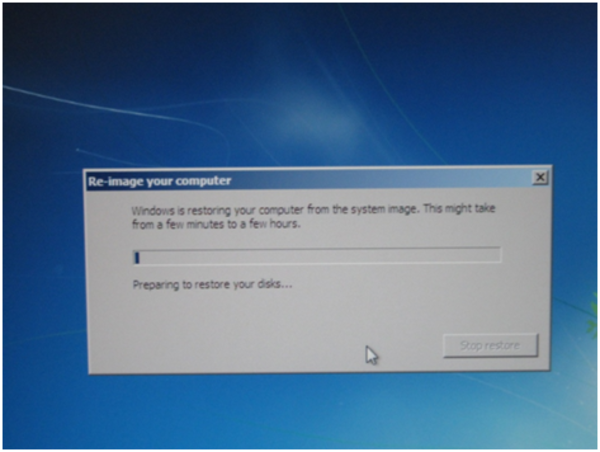
8. As the computer is restored, the progress bar will fill. When completed, if everything worked correctly the system will reboot with the Factory image/installation that was present when the unit was first removed from its box.
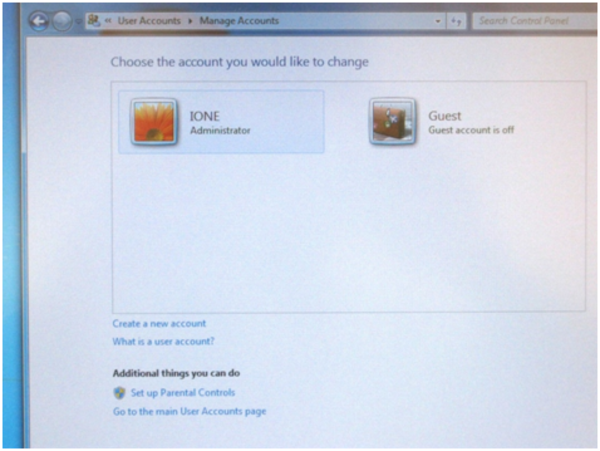
9. Once the machine has rebooted, navigate to Control Panel>User Accounts. Rename user account 'IONE' to personal preference.
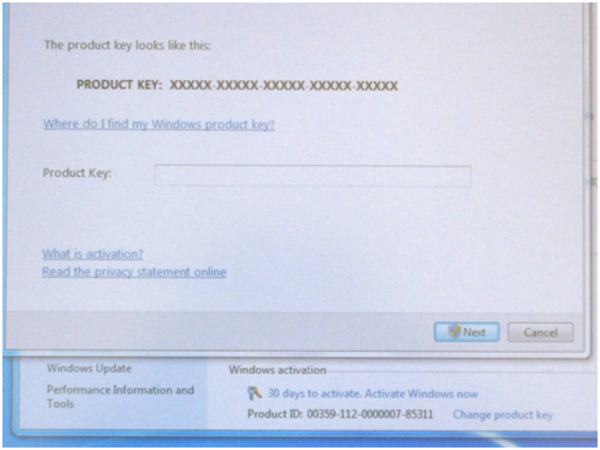
10. Before Activating Windows, right click the Computer icon in the Start Menu and choose Properties. In the System properties window, scroll down to the option Change product key and click it. Enter the correct Product Key for this system as listed on the PID sticker attached to the unit near the serial number. Once completed, Activate Windows.
Related Articles
How do I install Windows XP?
This article details how to complete a fresh Windows XP Operating System (O ...
View Article
How do I Back Up My Data (Files, Pictures, etc)?
Backing up a computer's data is a fairly simple, straightforward process. F ...
View Article
How do I Install Windows 7?
This article details the steps to completing a fresh Windows 7 installation ...
View Article
How do I Create a Backup of my PC?
If using Windows Vista Business, Windows Vista Ultimate, or any version of ...
View Article